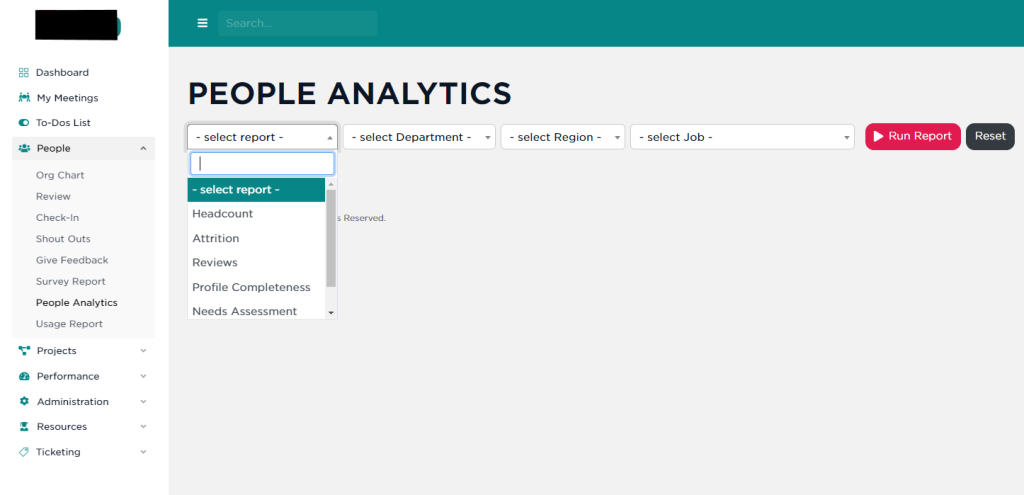
To Add or Manage Users in SecureDB, use the navigation panel and select Administration > Manage Users. Here you will see a list of current users that primarily or secondarily report to you, and if your role permissions allow it, you can edit or enable/disable user accounts. Editing a user account follows the same workflow as creating a user:
Creating a new user in SecureDB is straightforward. If your role has permission to create a new user, you can go to Administration >> Manage Users >> Add New. You could also type “Add New User” in the search bar at the top of the application and hit enter.
Follow these steps to ensure a smooth setup:
1. Access User Management: Navigate to the Administration dropdown menu bar and select “Manage Users”.
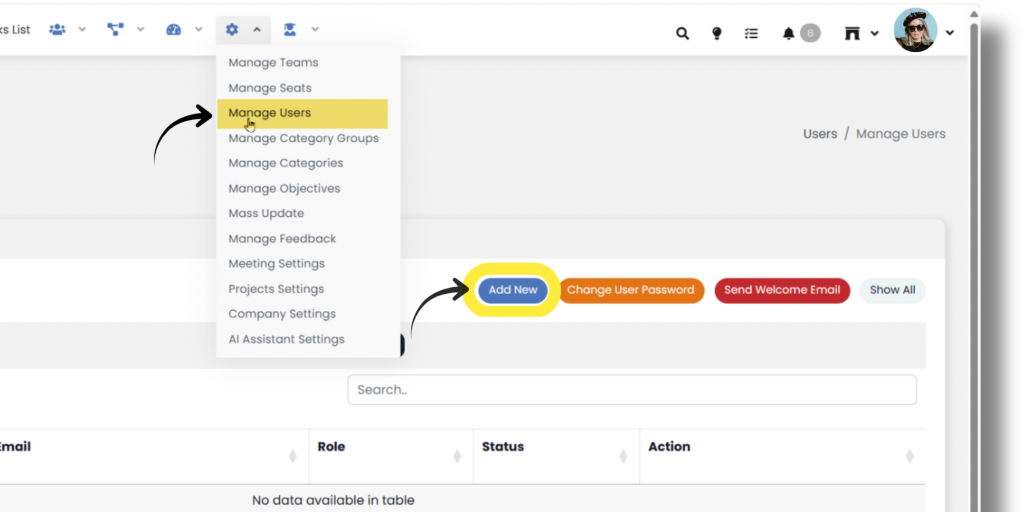
2. Add New User: Click the “Add New” button at the top of the page.
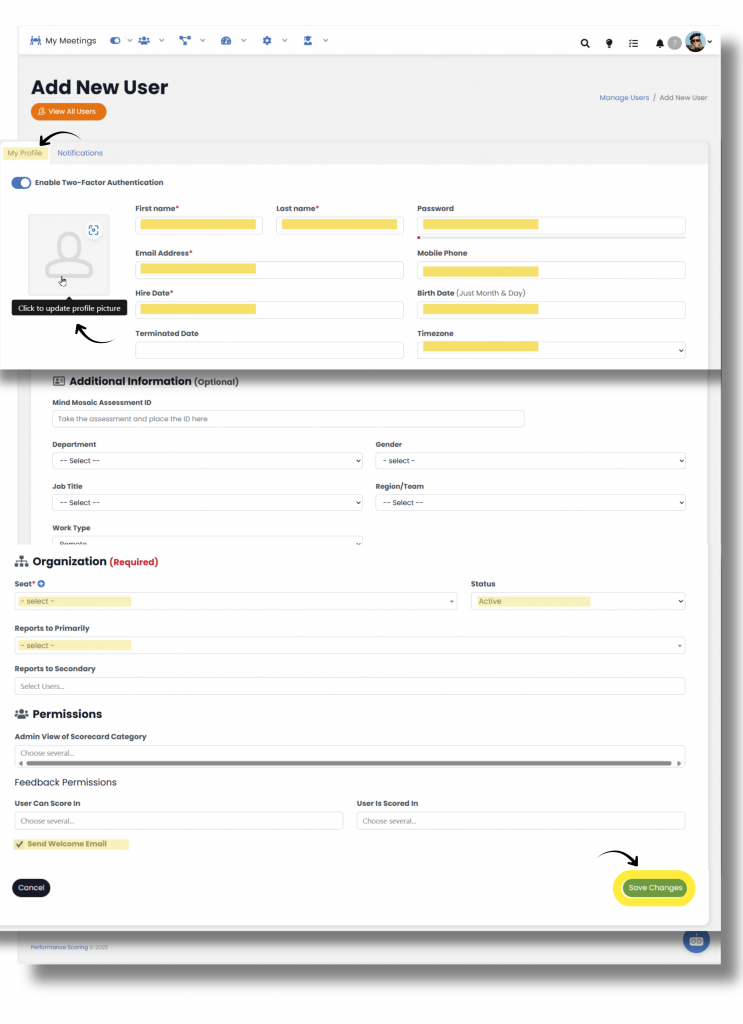
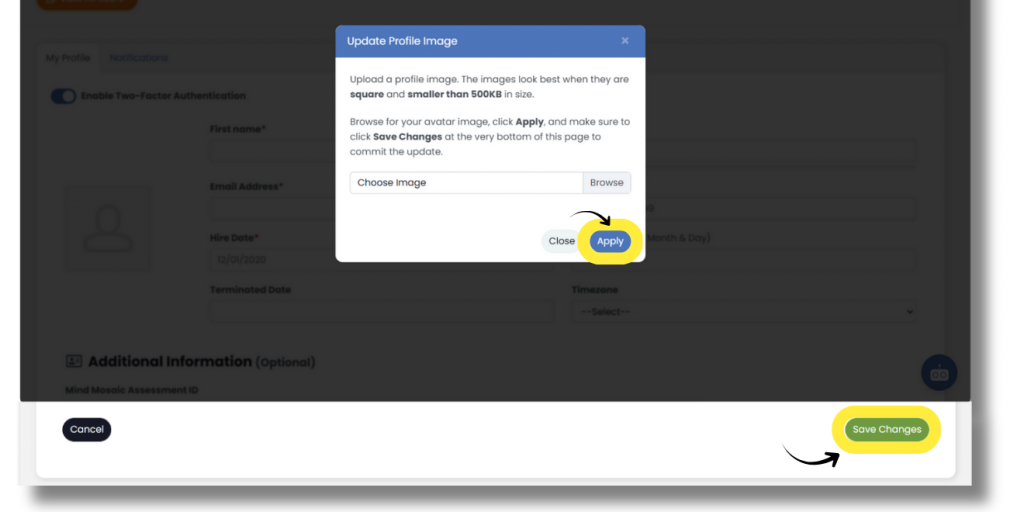
3. Fill in User Profile: Enter the required fields such as First Name, Last Name, and Email Address. Setting a Password is optional at this stage, as a welcome email will allow the user to set their own. Mobile Phone and Birth Date are not required immediately and can be updated later. Leave the Terminated Date blank unless the user is being terminated. For more details on user profile setup, see our guide on User Profiles.
4. Additional Information: This section includes optional fields for initial user setup. You can select a Behavioral Profile, Department, Gender, Job Title (which can be the same as role), Generation, Region/Team, and Work Type (On-Site, Remote, or Hybrid).
5. Organization Details: Choose the user’s role, Status, and reporting structure under “Organization.”
- Select Primary role from the dropdown: This is the user’s main role in the organization.
- Select Secondary role(s) from the dropdown: This optional field allows other role duties to be added to the user when they cover other assignments in the organization.
- Select Status from dropdown
- Select Reports to Primarily from list
- Select Reports to Secondary list
6. Set Permissions: This optional section allows you to define the user’s permissions in SecureDB, including Admin View of Scorecard Category, Factor Categories for scoring, and more. For a detailed explanation of user permissions, refer to our Permissions Glossary.
- Choose Admin View of Scorecard Category
- Choose Factor Categories User Can Score In
- Choose Factor Categories User Is Scored In
7. Save Changes: After completing all the necessary fields, click “Save Changes” at the bottom to add the new user.
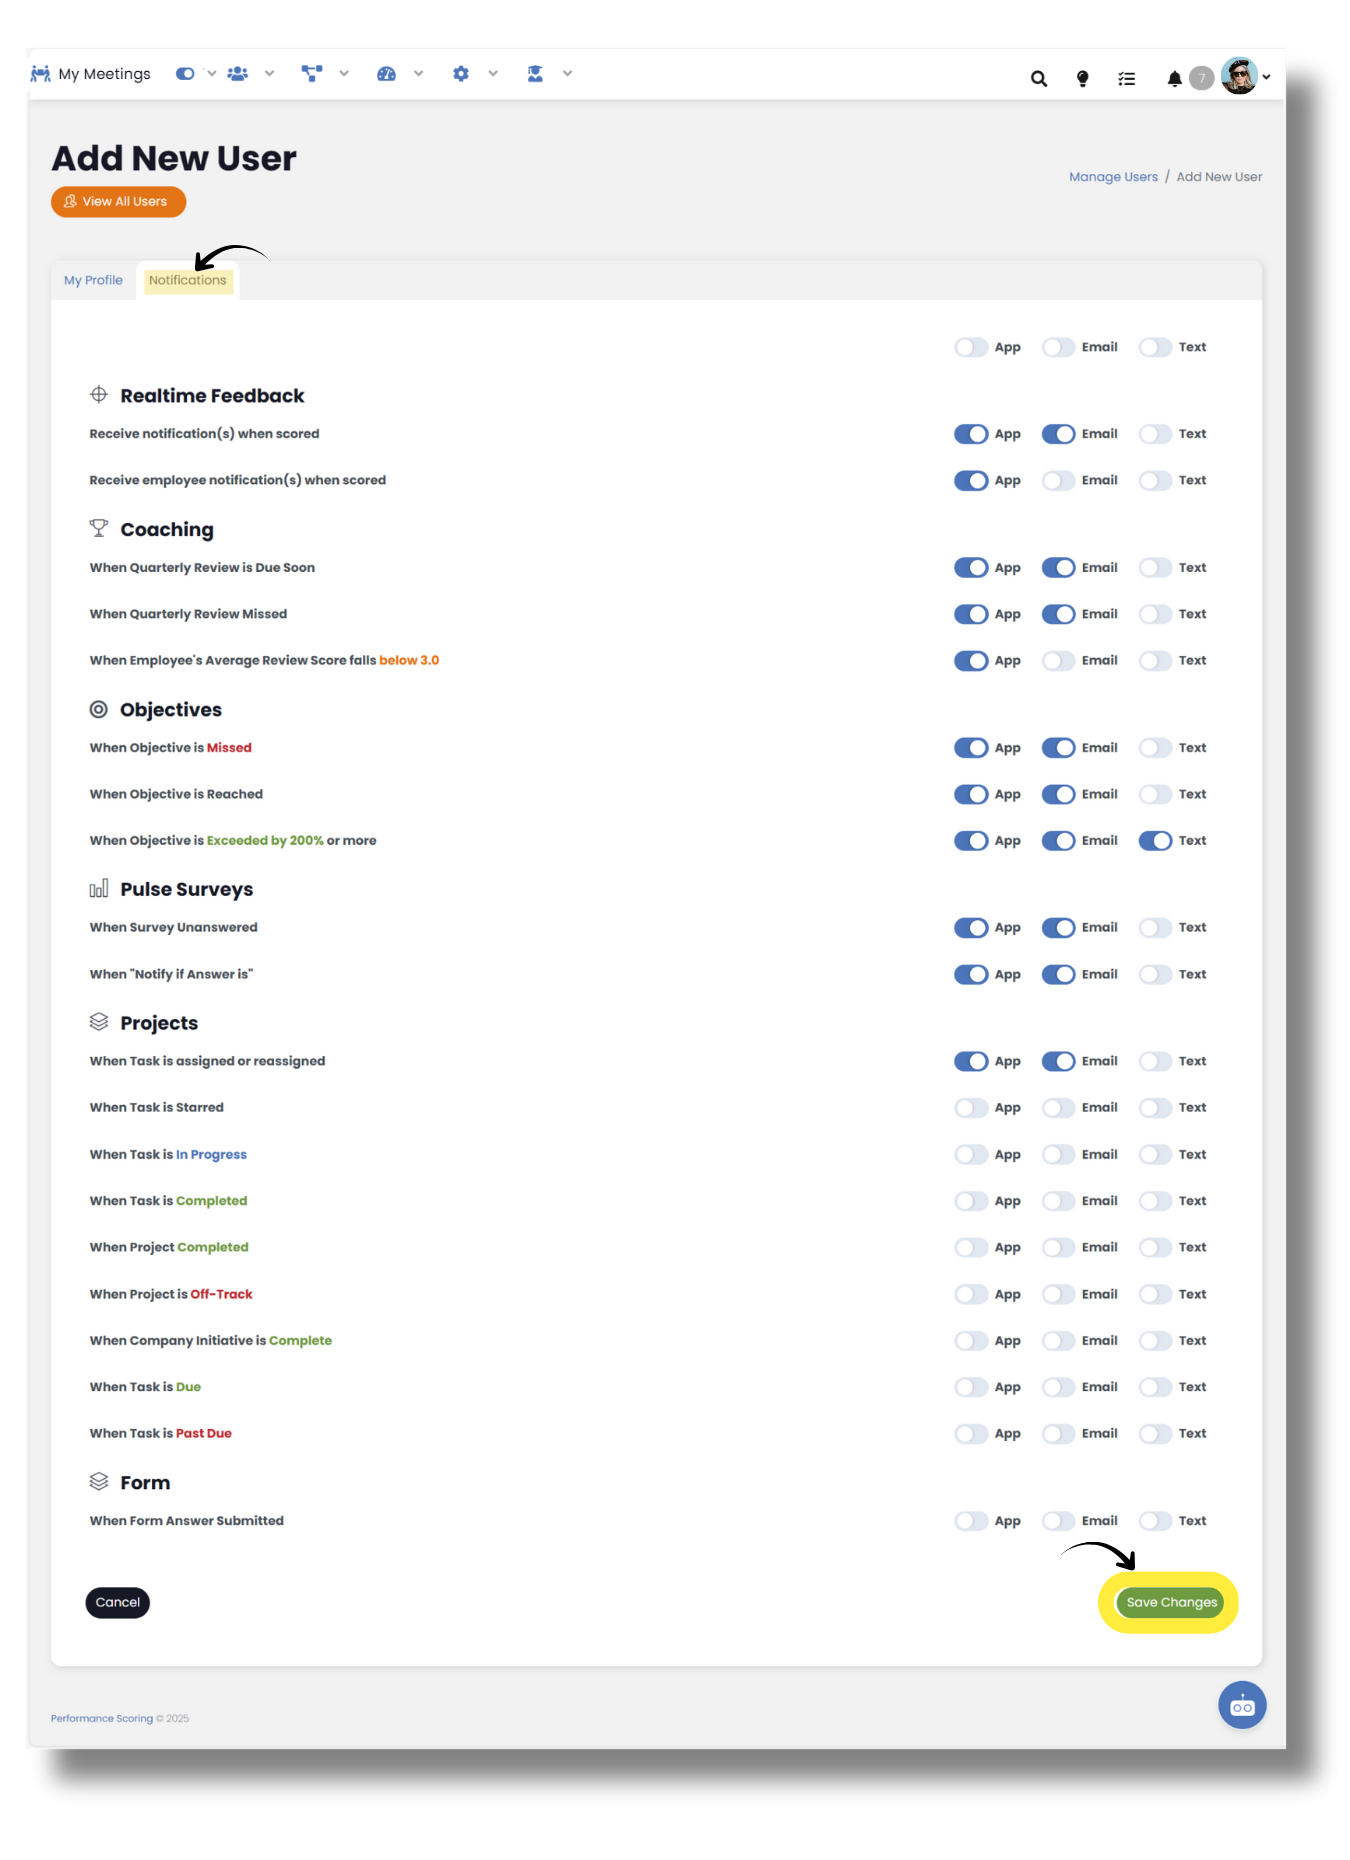
Notifications Tab: At the top of the page, there’s a tab for “Notifications.” These come with pre-selected defaults, but can be updated here or by the user under “Edit Profile.”
Next up: Add Teams


