There are all sorts of things you can embed in your meetings, but it’s important to understand that these are “embedded” from 3rd parties. Each one has their own way of embedding things and their own ways to manage security, privacy, and functionality. Let’s walk through how to embed a Microsoft Excel document in your meeting.
Embed a Microsoft Excel Document
To embed an excel document in your meeting, you’ll need to have a valid Office 365 account. If you have that, here’s how to grab the appropriate embed code.
- Open your document in your web browser (ideally via SharePoint or OneDrive)
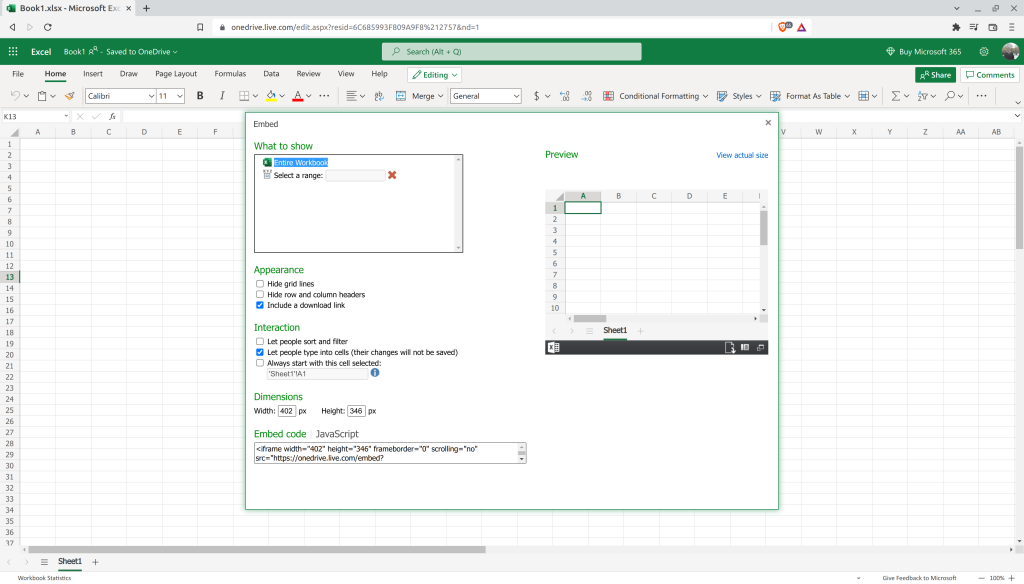
- Click on File >> Share >> Embed
- Select whatever options you want and copy the “Embed Code” at the bottom of the window
- In Meeting Settings >> Embed Items, select iFrame, paste the embed code, and give your new agenda item a name
- Click Update Meeting

For security reasons, Microsoft won’t let you update or edit the document from inside your meeting because it can’t ensure you are you. However, any updates made to that original Excel document, hosted in the cloud will automatically update in your embedded document within the meeting.
What if it shows an error?
This is a common problem with files hosted within SharePoint. Once embedded in your meeting, Microsoft has no way to check permissions because the application that’s requesting the information isn’t you–it’s Etho. For this reason, your Excel document’s permissions will need to be wide open–Public.
Your SharePoint administrator may not have a Public SharePoint directory or have that folder truly public. You’ll need to get with your IT administrator to discover how the permissions are set. Alternatively, you could save the document to your personal OneDrive and set its permissions to Public. After all, the only way to find that document would be to have the link. It’s not public, in the sense that anyone can Google for it.


