Implementation Team Training –Bulk Updates
Now we will fill in the missing fields from user setup – Phone, Birthday, Department, Gender, Job Title, Generation, Region, and Work Type.
For your upload, you will use the Excel SecureDB-Upload Template I saved to the SecureDB Implementation Training folder on the Titus Network.
Now the steps to filling in that spreadsheet.
- From within your training organization Select Bulk Import/Update -from the Users section of the left menu
- Select Export at the top of the Bulk Import/Update page
In the Export Data (CSV) field select Users then click Download
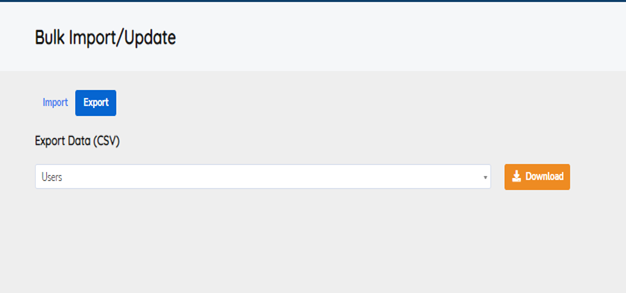
- A CSV file names users will download to your local Downloads folder.
- Now open the SecureDB-Upload Template spreadsheet as well as the Users spreadsheet
The users file provides you a complete list of users within your organization.
- Copy only the Email, First Name and Last Name columns from your Users spreadsheet then Paste the columns to the Email column in the SecureDB-Upload Template. spreadsheet.
- Next delete any Internal Users from the spreadsheet – Any Titus/SecureDB users, Support etc
Your spreadsheet should now look like this:

- To simplify this first phase, just complete the information in Phone, Birthday, Gender, Generation and Worktype.
- Phone – for training use the same phone number for all if you’d like.
- Birthday – format mm/dd/yyyy – you can use same year for all as the application
hides the year anyway. - Gender – 1- Male 2 – Female 3 – Non-Binary
- Generation – 1 – Baby Boomer 2 – Gen X 3- Millennial
- Worktype – 1 – On-Site 2- Remote 3 – Hybrid
- Phone – for training use the same phone number for all if you’d like.
Your spreadsheet should now look something like this:

- Be sure to save your file – you can rename it just keep it as a csv
- Now you can return to Bulk Import/Updates in the application.
Bulk Upload and Import
Click the Import pill button to access the file choose and upload form.
Select the your newly saved CSV file and click the “Up” arrow.
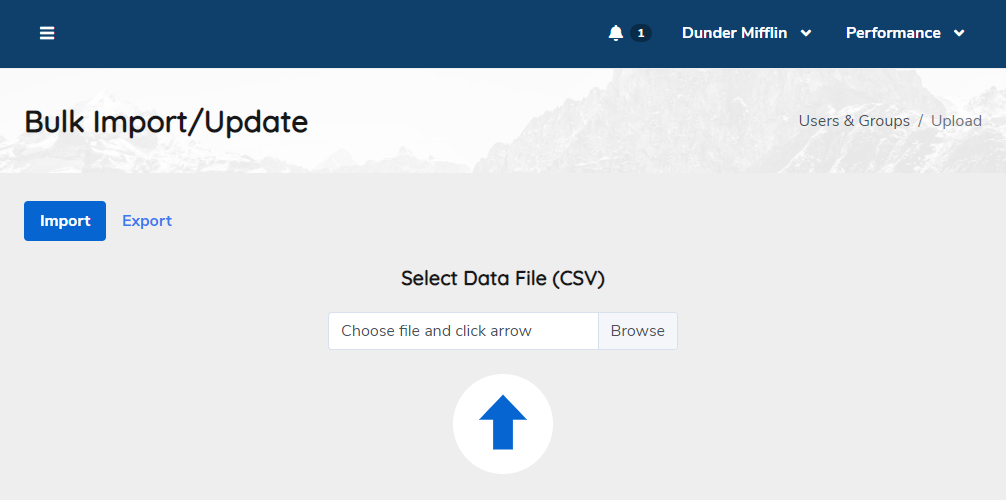
Once that file has been uploaded and processed, you’ll be given some options to map each column to the correct location in the database.
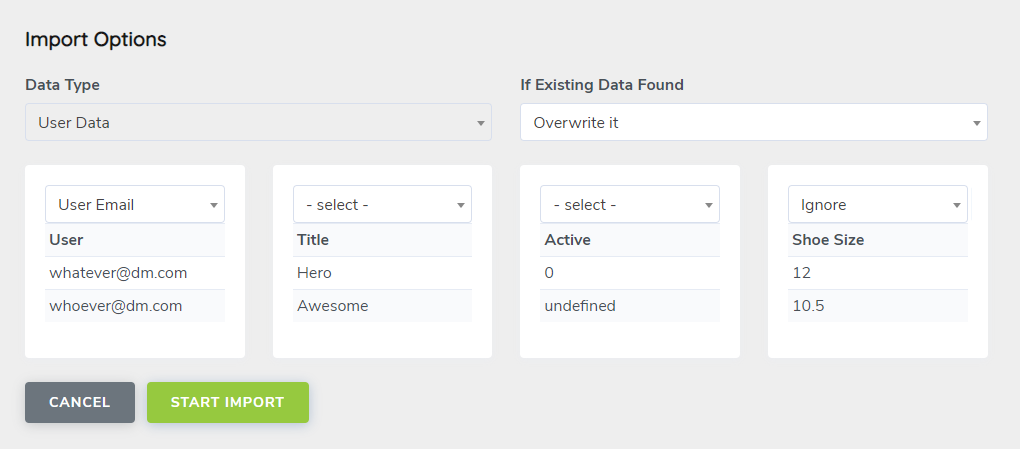
Since we want to overwrite anything that matches our inputs, let’s select “Overwrite” from the first dropdown at the top. Then, we see the column headers in the uploaded document and a few example rows. Above each, select where you want this data to go. If it’s unrelated or unwanted data, choose “Ignore” and the system will skip that column.
Once you’re done mapping each column, click the green Start Import button.
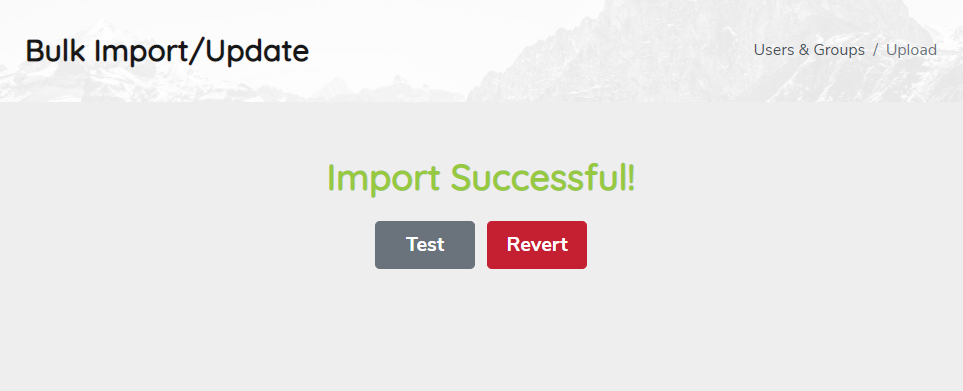
If the import is successful, you will be greeted with two buttons: Test and Revert. Open the “Test” button in a new browser tab or window. DO NOT close this tab/window. Check to see if your changes were made the way you wanted them. If anything went wrong, return to this screen and click the red Revert button which will restore the database to what it was just before your import. Once you’re happy, close the window.


