Create beautiful custom forms and surveys as easily as a Google Form and gather feedback from inside or outside of the organization. User’s within the organization who have SecureDB accounts can access Forms based on their role permissions. For anonymous forms or to gather information from outside of the organization, users can access forms via a special link or QR Code. All submitted form data shows up in the application allowing users with permission to analyze the data in aggregate or drill down to specific responses. Form data is also downloadable as a CSV to perform your own customized analysis, or form responses can be printed or saved as a pdf file.
Forms Walkthrough Video
Using Forms in SecureDB
To get started with Forms, let’s take a look at the main Forms page. If your system’s admin has enabled Forms and your role has the correct permissions, you’ll find “Forms” in the main navigation under “Performance.”

On the main Forms page, users will see Forms they have access to interact with based on their role permissions and the individual permissions of each Form. Depending on these permissions, users can do the following:
- View the Form: allows users to fill out the Form for SecureDB users with accounts, or to access the Form URL or QR Code.
- Edit the Form: allows users to edit the Form layout and questions as well as update individual Form permissions.
- Delete the Form: allows users to delete the Form and ALL associated data.
- View Reports: allows users to analyze submitted data from each Form. *Note: users can only see Form data for other users that report to them unless specific permissions have been turned on elsewhere.
- Archive/Restore: allows users to archive a Form without completely deleting all information. Archived Forms are able to be restored.

Create a New Form
To create a new custom form, select “Add New” from the top right of the Forms list:

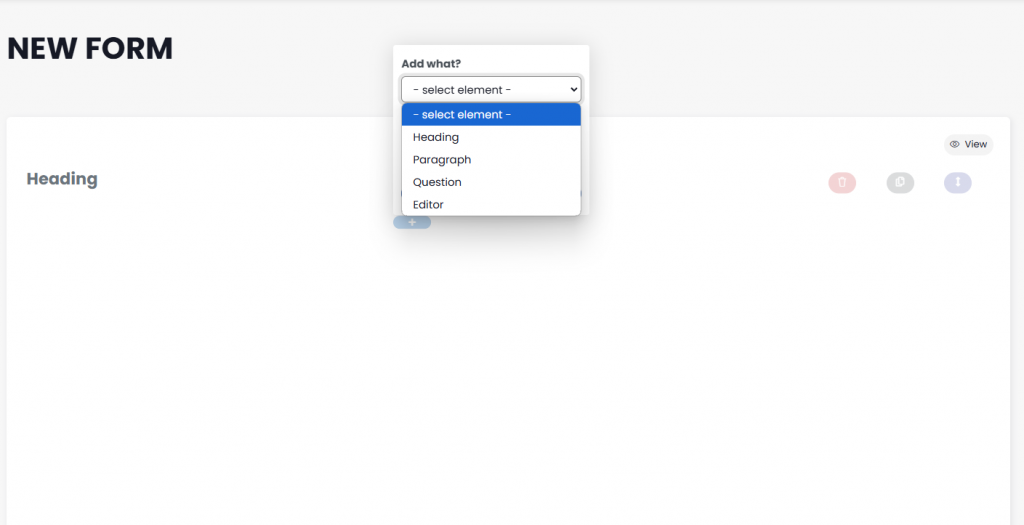
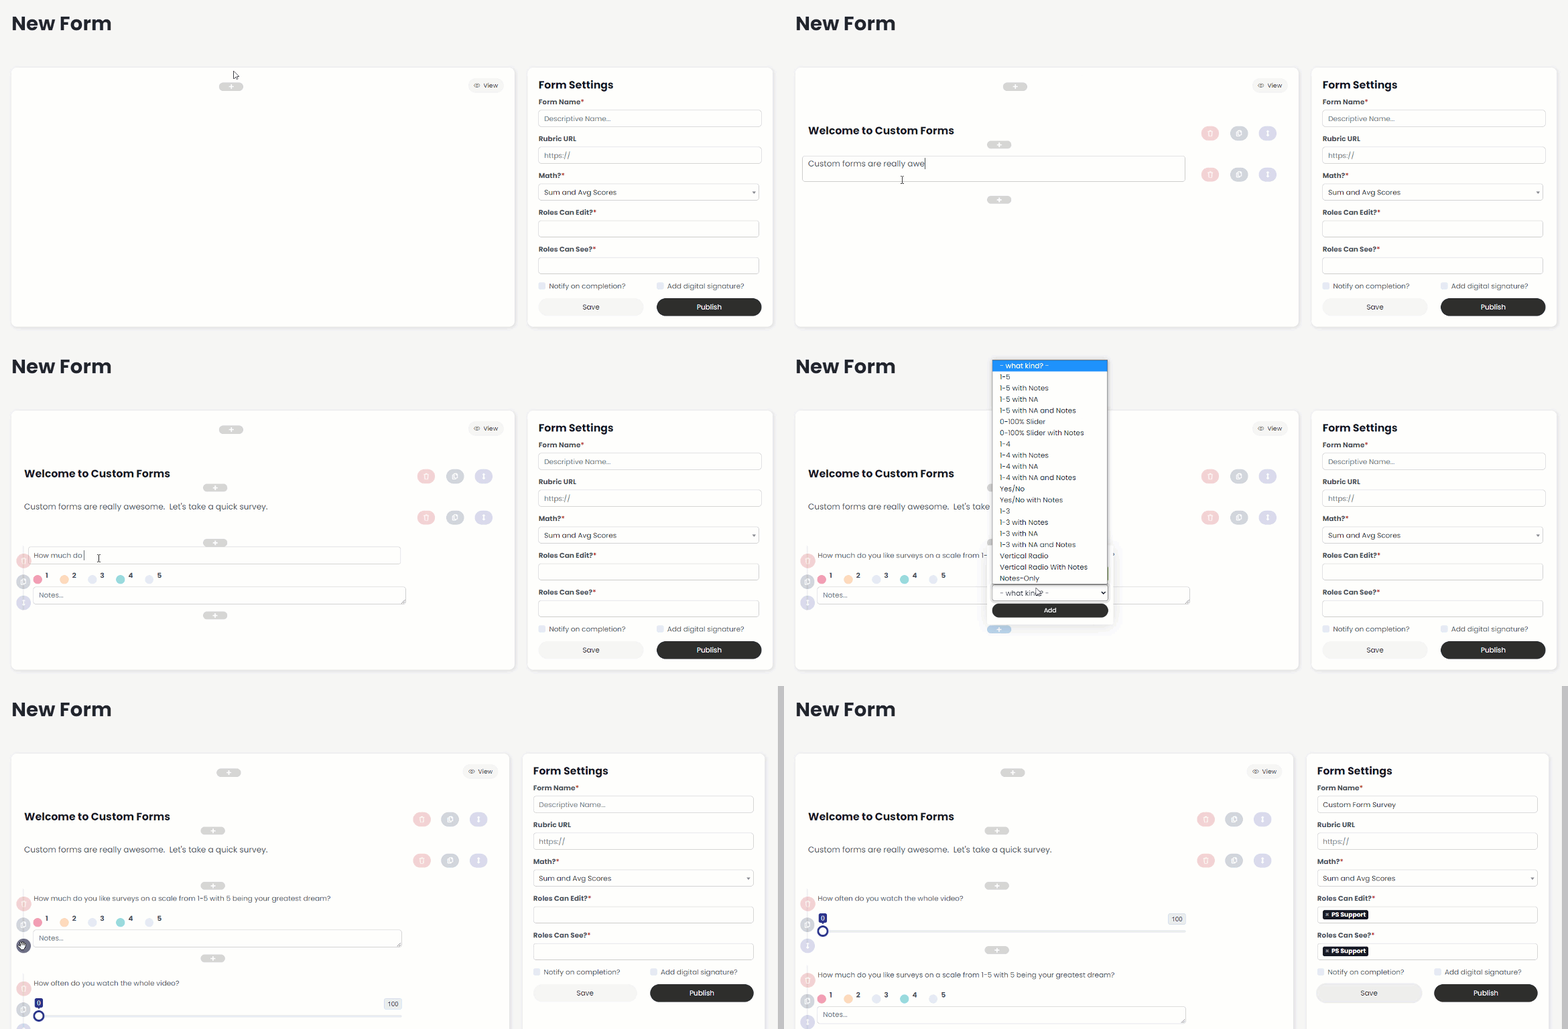
Click the “+” button to add form elements to your new form. Select the form element you want to add and click the “add” button. Then, edit the new form element right inside the new form. The form elements you can choose from are as follows:
- Editor: creates a rich-text field that allows you to insert images, links, and formatted text; good for combining headings, subheadings, and text for complex instructions that need details.
- Question: this is where your Form data will come from. Choose from 1 of 23 different question types!
- Paragraph: creates one simple text field; good for adding Form instructions or directions.
- Heading: creates a bold heading that stands out; good for simple section breaks when you don’t want to use the Editor.
You can reorder form elements by dragging & dropping them via the blue “up/down” arrow buttons. Clone them by clicking the grey “Copy” button. Delete form elements by clicking the red “trash” button. Additionally, you can make questions required by checking the “Required” box.
Form Settings
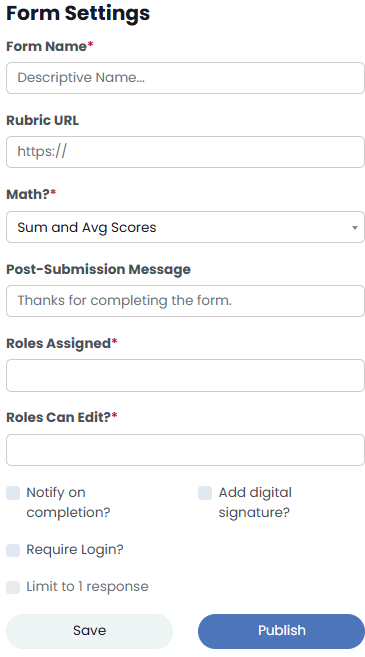
Once you’re done editing your Form, update the following settings before publishing:
- Form Name – The title of your form.
- Rubric URL – If you have instructions for how the form should be completed and what the values should “mean”, you can put the link to that rubric here.
- Math? – Data collected in the form can be calculated if in a few simple ways.
- Sum – adds all the numeric data in the form to come up with a total.
- Average – calculates the average of all numeric data in the form.
- Sum and Average – displays both calculations.
- No Total Scores – calculations will not show.
- Post-Submission Success Message – Change the default message displayed after a form is submitted.
- role Assigned – role that will see the form on their main Forms page when logged in to SecureDB.
- role Can Edit – role that have editing rights to the individual form.
- Notify on completion? – Check this box for notifications to be sent each time the form has been completed.
- Notify role – every user with that specific role will be notified (follows reporting structure).
- Notify Individuals – only certain users will be notified.
- Add digital signature? – This will add a “I certify that…” checkbox at the end of the form which must be checked in order to submit the form.
- Require Login? – When you don’t want to allow anonymous form completions, select this option to require users to login to be authenticated before they can complete the form.
- Limit to 1 response – When requiring a login to complete the form, check this option to limit responses to one survey completion per logged-in user.
Edit Existing Form
To edit an existing form, you must be in a role
that Form has included in “role Can Edit.” Simply choose Edit on the Form’s row on the main Forms page. Once your edits are complete, click Save or Publish to commit those changes.
Gather Form Data
What good is a form if nobody can see it? With SecureDB Forms, logged-in users with the appropriate viewing permission can see and complete the form. However, forms can also be distributed without the need for login using QR codes and links. Data gathered from these methods will be completely anonymous if the user is not logged in to SecureDB.
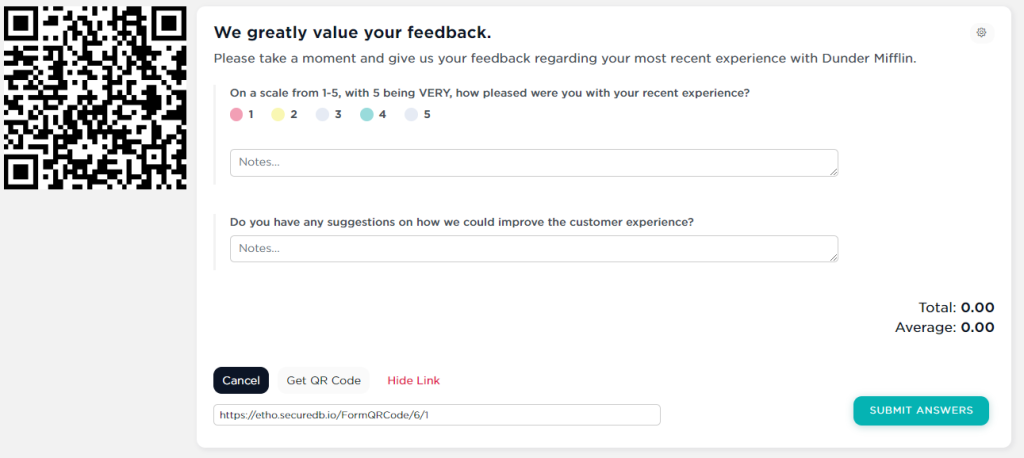
At the bottom of any Form, you’ll see two buttons. Click the “Get QR Code” button to display a copyable QR code at the top left of the Form. This QR can be scanned from any device and will direct the user to the Form. Alternatively, you could use the “Get Link” button which will display a full URL to that can be copied and sent out via email, text, or pasted into a document.
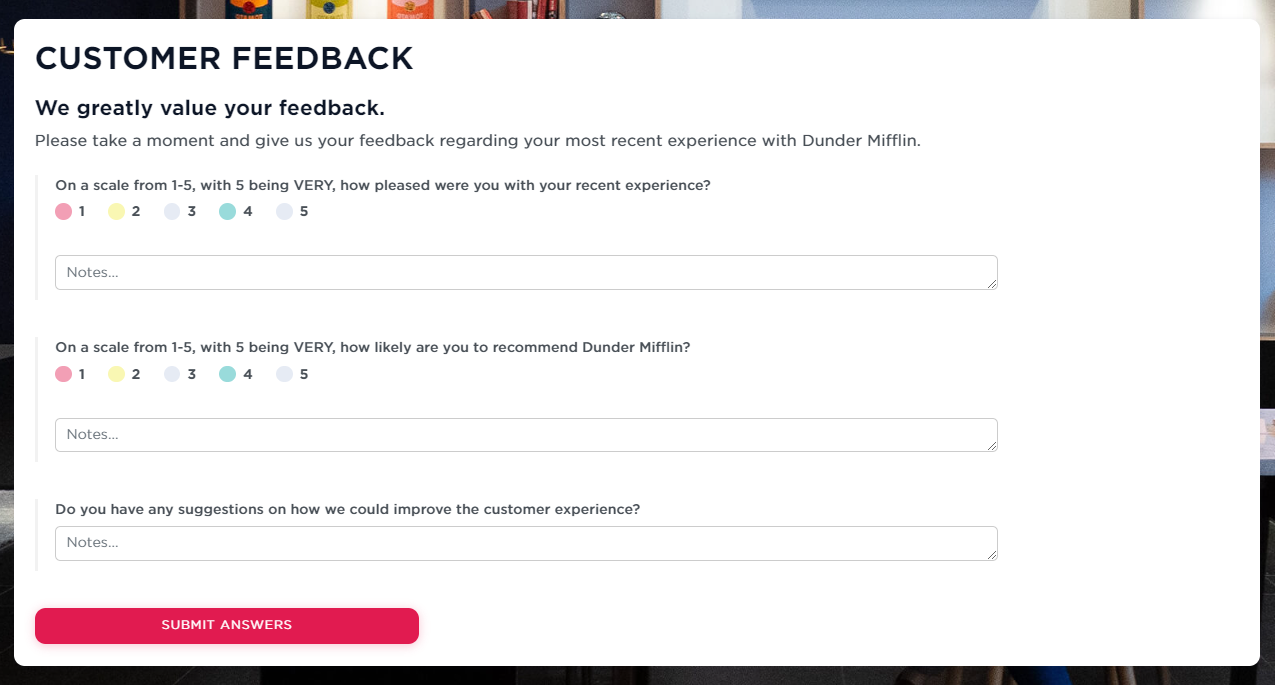
Embed Custom Form Externally
Also at the bottom, you have the option to “Embed” the form on an external web page. Simply click “Embed” and copy & paste the embed code onto your website and the form will auto-embed itself there. It will also inherit the style of the site it’s embedded on.
Custom Form Reports
Click the “View Reports” button for any Form on the main page to view all entries for that individual Form. Select “View all Form Reports” to see a dashboard view of all Forms submitted along with their individual scores (Total and Average, if applicable).

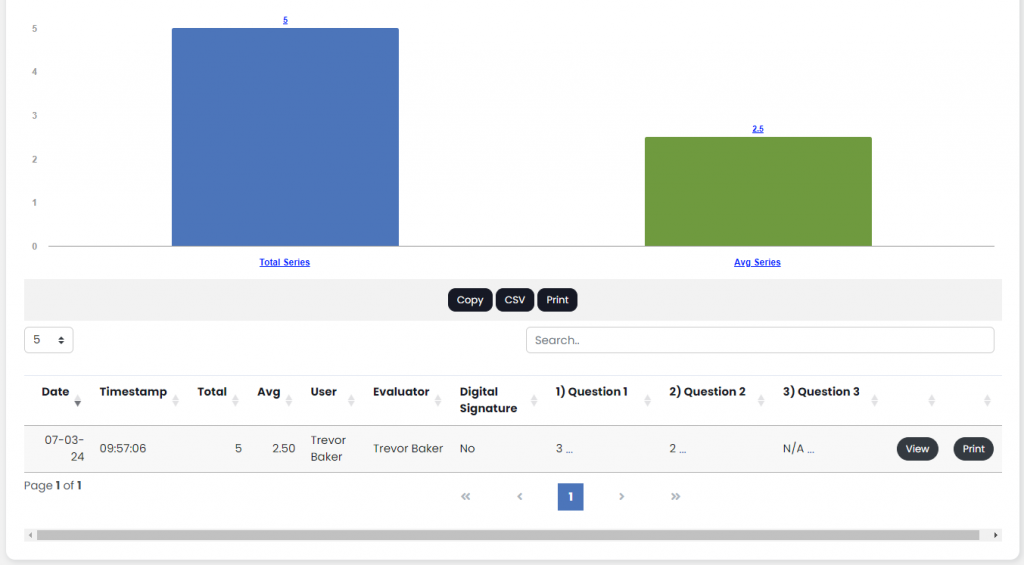
Once a Form Report has been selected, you can adjust the date range and select “Pull Report” to see entries for a custom range of dates. Use the drilldown bar chart to disaggregate numeric data, or use the table below the chart to see individual responses. Form data for the selected range can be exported as a CSV for even more in-depth analysis, or you can choose to View the Form as a page or Print to have a hard copy or save as a pdf file.

![5 Ways to Improve Employee Engagement Through Feedback [brandname]-feedback-featured](https://securedb.io/kb/wp-content/uploads/2023/04/etho-feedback-featured.jpg)


