“Rocks” are a way to bring parts of the application together into formalized meetings and group To-Dos into Rocks. It’s part meeting management and part Rock management–with a lot of smart tools behind the scenes to help managers coach their teams to success and keep teams accountable and praised for all the hard work they do.
But, how do we get from zero to hero with Rocks. Here’s a “Quick Start” guide to get you off the ground.
Setup Permissions
Before you can do much of anything with Rocks, you first need to enable permission to access it. Go to Administration >> Manage Seat. Then click “Edit” next to the user Seat you want to enable Rocks for. You will see the far-right column is Meetings & Rocks, here you can enable the ones you want for this Seat and click Save Changes. Do this for all the user Seats you want to have access to Rocks.
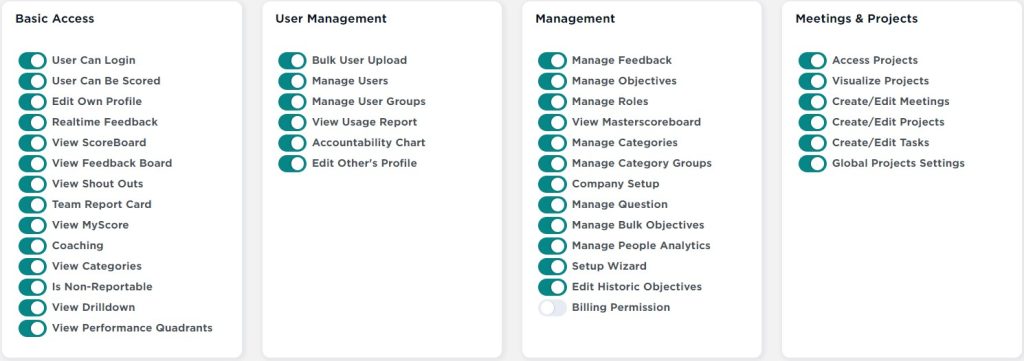
Here’s what these 6 permissions mean (from the Permissions Glossary).
Setup Defaults
Now you can see “Rocks” in the left-hand sidebar. Next click on Administration and select Meeting Settings from the menu. Here you can setup defaults and even rename parts of Rocks to better suit how your organization refers to things. For example, you might not call them “To-Dos.” You might call them “To-Dos.” You can rename them here.
There’s a lot of customization that can be done from Rock Settings. Check out the full Knowledge Base article on it here.
Create 1 and 3 Year Goals
From Administration >> Meeting Settings, you’ll see a tab for 1 and 3 Year Goals. These are BIG, high-level buckets to group Rocks and visualize them in reports. Keep these broad and with a time-period. No Rock or To-Do will be able to be outside of this date range.
Perhaps you have an 1 and 3 Year Goal called “Q3 Sales and Marketing.” Then, Rocks and To-Dos can all be associated with that 1 and 3 Year Goal. You could also have more specific ones like “Increase Sales by 5% by EOY.” In that case, set the END date to December 31st and let managers create Rocks designed to help meet that lofty goal.
Create Segues
The Segue is an important part of any Etho meeting. It’s the moment when attendees transition from working “in the business” to working “on the business.” There is a default list of Segue questions to help you make that transition already loaded. If you’d like to write your own, delete the defaults, or edit them, you can do so from the Segue tab of Meeting Settings.
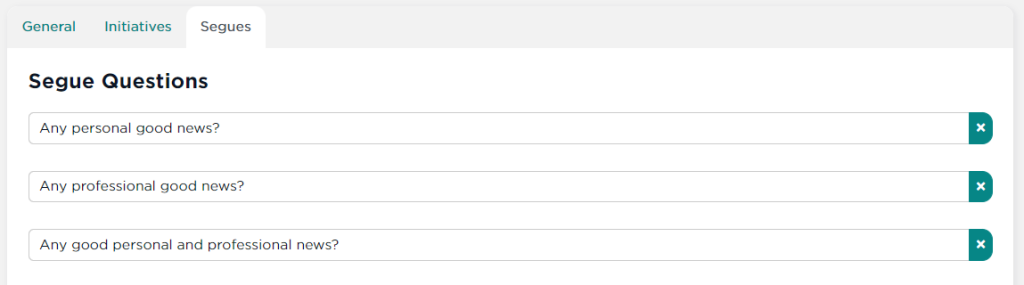
Edit any of the defaults in each input row. Click the “x” to the right to remove one. To add a new row, click the + Add Question button after the last question in the list.
Once you’re thrilled with your bank of genius Segue Questions, click the Save Changes button at the bottom.


