Whether you’re starting fresh or have a ton of user data to update, the Bulk Import/Update function is your best friend. Let’s break it down into two parts. The first is the Export, which allows you to pull raw user data out of the database. The second is the Import function which allows you to bulk update user data in the database.
WARNING: This is an advanced function designed for use only by Power Users. There is a backup/test/revert safety net built-in, but you can still get into trouble if you’re not careful with it.
To access Bulk Import/Update, click on Administration and then Bulk Import/Update.
Export Existing Data
Just below the page title, you’ll find two pill buttons: Import (default) and Export. Click on Export to view the available User Data Tables you can export from the database. This is valuable because it’ll show you how things are setup currently in the database. For example, what unique ID is the “CEO” Role.
Choose the data set you want exported from the dropdown and click the Download button. Your browser will download the data converted to a CSV file you can open in your spreadsheet of choice (i.e. Google Sheets, MS Excel, etc.).
NOTE: For user data, specifically, the Profile data set is probably the most useful.
Bulk Upload and Import
Click the Import pill button to access the file choose and upload form. Select the updated CSV file you want to import and click the “Up” arrow.
Once that file has been uploaded and processed, you’ll be given some options to map each column to the correct location in the database.
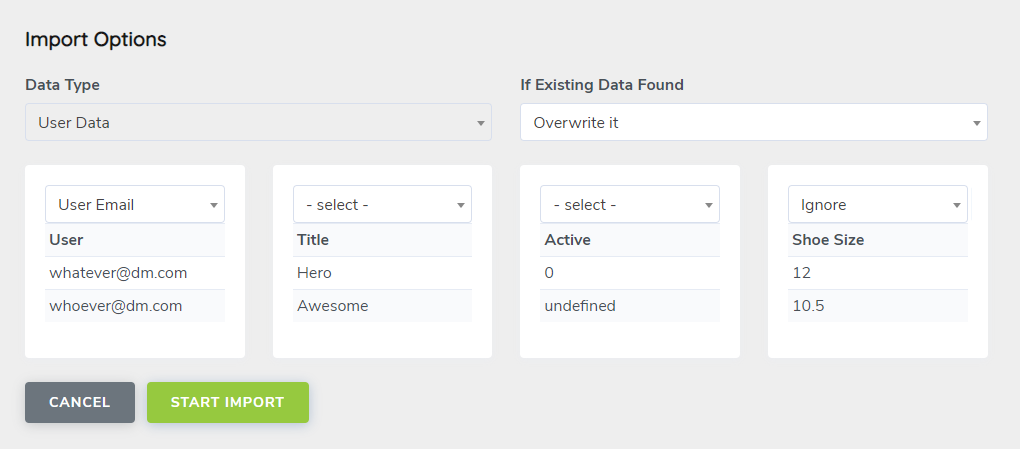
Since we want to overwrite anything that matches our inputs, let’s select “Overwrite” from the first dropdown at the top. Then, we see the column headers in the uploaded document and a few example rows. Above each, select where you want this data to go. If it’s unrelated or unwanted data, choose “Ignore” and the system will skip that column.
Once you’re done mapping each column, click the green Start Import button.
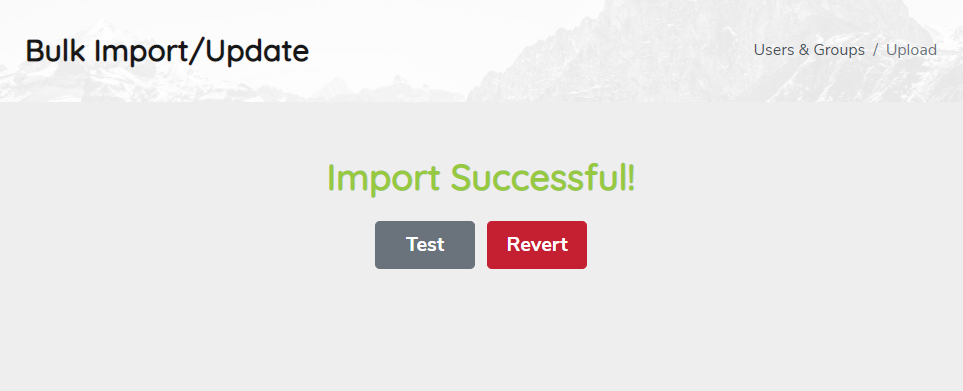
If the import is successful, you will be greeted with two buttons: Test and Revert. Open the “Test” button in a new browser tab or window. DO NOT close this tab/window. Check to see if your changes were made the way you wanted them. If anything went wrong, return to this screen and click the red Revert button which will restore the database to what it was just before your import. Once you’re happy, close the window.
If you receive an error like, “Oops. There was an error importing the data,” please see the support post: “Error Importing Data,” or contact your Account Representative.


