Read Initiative cards in meetings
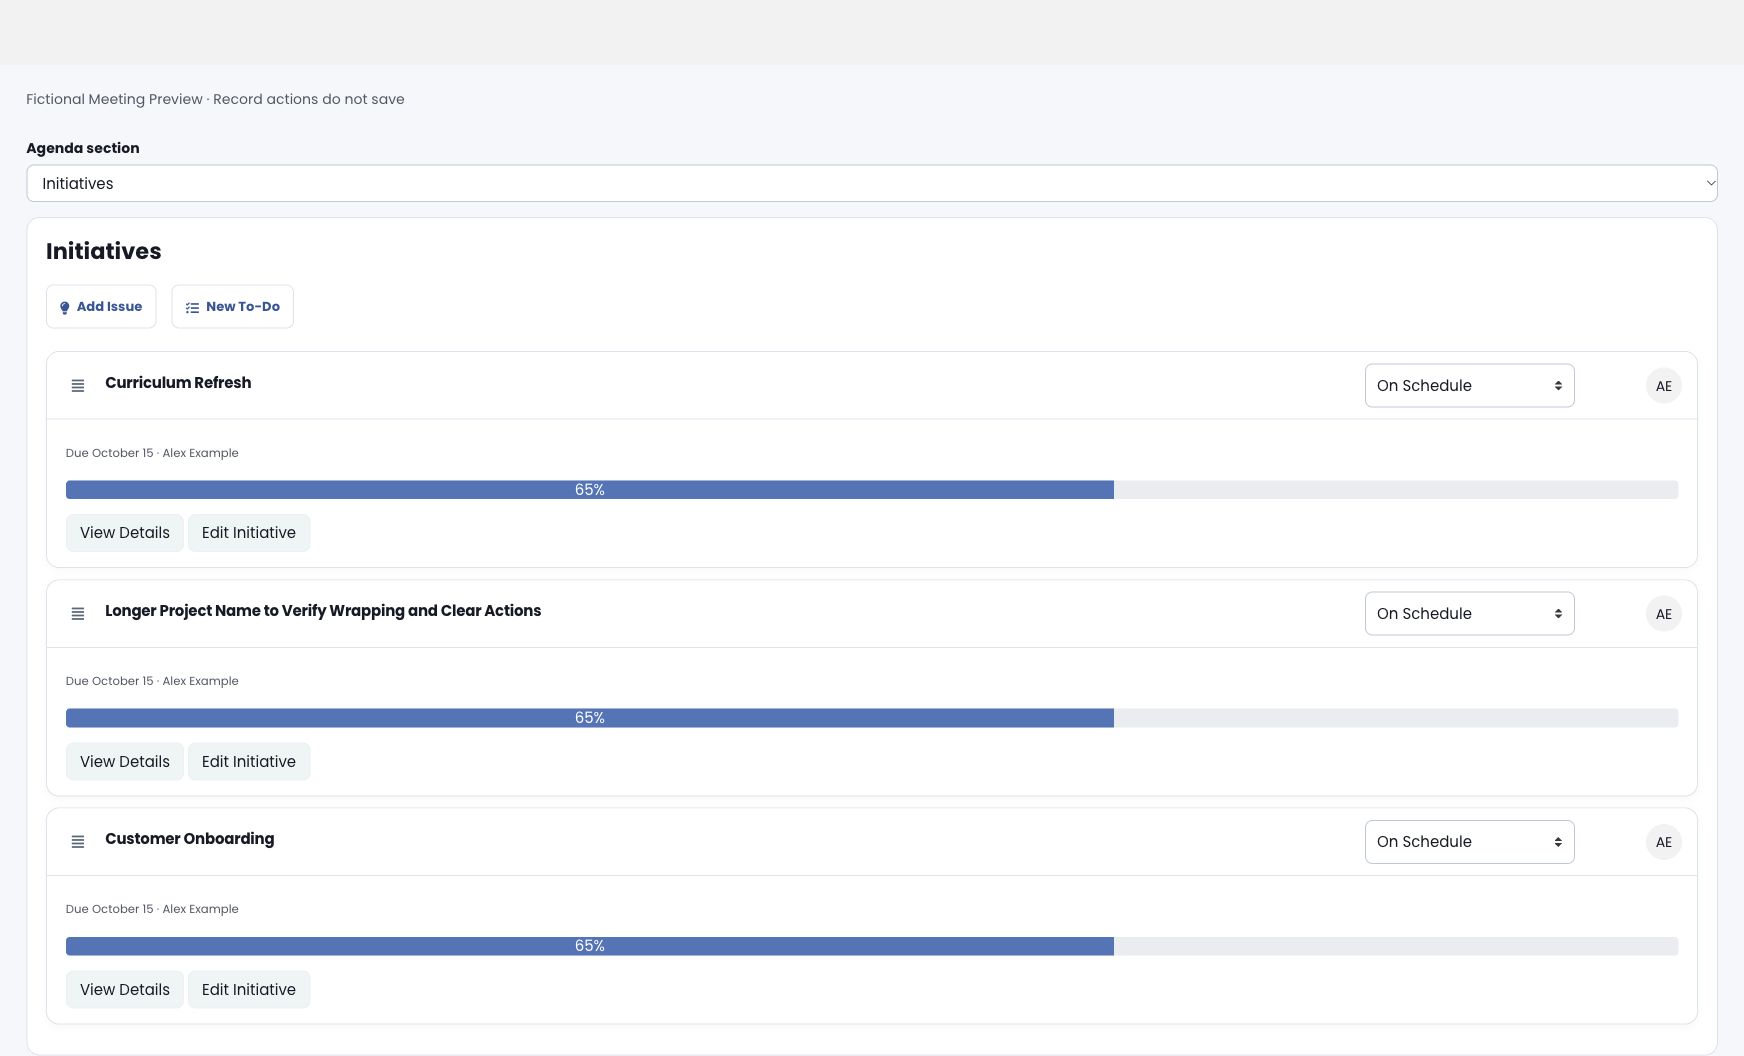
Meeting Start and Meeting Preview keep Initiative names, owner photos or centered initials, dates, progress and status together. Use View Details to open the full record and Edit Initiative where your permissions allow changes. Creation actions use your organization’s configured Question and Task names.
On narrow screens the card header and actions wrap within the card. Buttons remain centered and readable without overlapping the avatar or clipping the title. The underlying Initiative, Project and Task relationships stay the same.
In LoopSpire, you can create long-term goals with Initiatives. Initiatives are designed to be a group of Projects (which consist of their own Tasks) that contribute to the larger goal. This layered structure enables you to manage and track progress at different levels—from the granular Task level to the broader Initiative level. By grouping Projects together under a single Initiative, you can focus on achieving a strategic Goal while monitoring the performance and timelines of each individual Project.
How to Create Initiatives
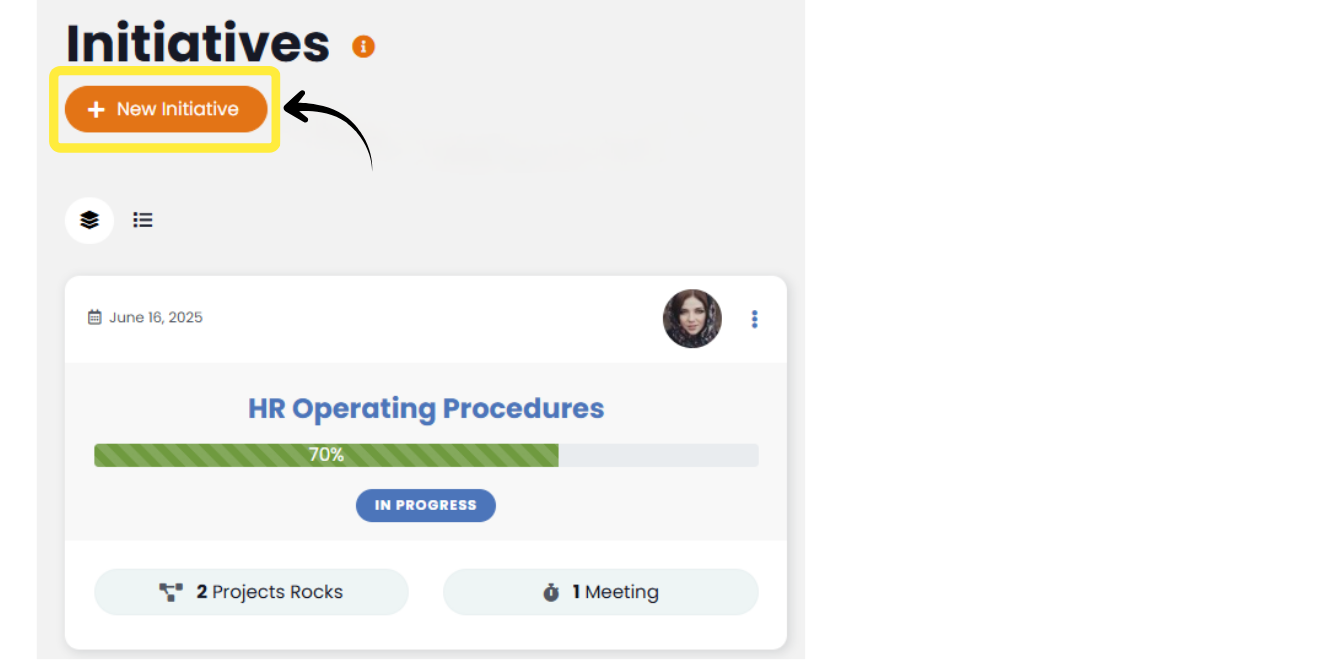
Click the “Add Initiative” button at the top of the to Initiatives listing page to open the Initiative creation modal.
Alternatively, Initiatives can be created directly from the Business Planner the same manner described below.
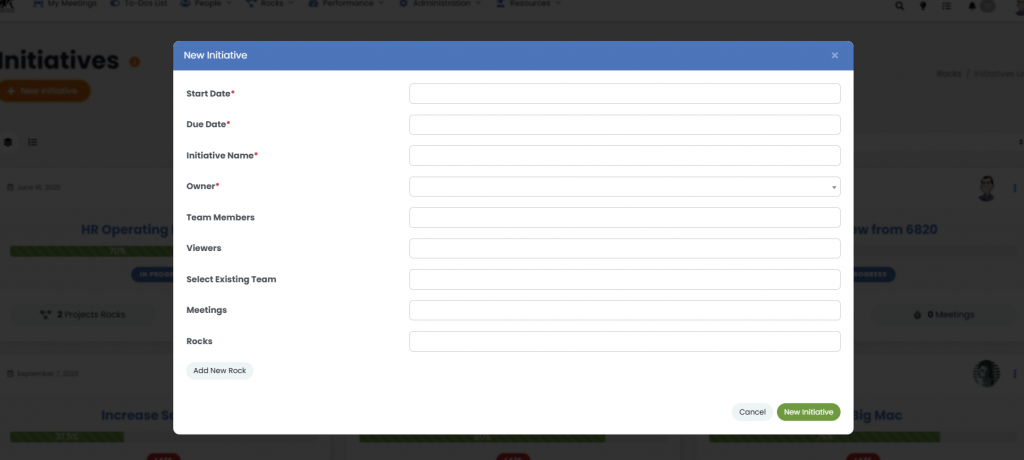
- Start Date & Due Date: Select the appropriate start and end dates from the date picker fields.
- Initiative Name: Enter a descriptive name in the “Initiative Name” field.
- Owner: The person who will oversee the Initiative.
- Team Members: Individual users who need to view and interact with the Initiative.
- Viewers: Individual users who only need to view the Initiative but aren’t contributing members.
- Select Existing Team: Add entire Teams to the Initiative.
- Meetings: If needed, select one or more meetings from the dropdown. This will associate the Initiative with the selected meetings’ agenda.
- Projects: If there are Projects already created that need to be associated with the Initiative, select them from the dropdown. In the “Add New Project” button, and you will see a default Project block that can be filled out as normal.
- Once you’ve added and reviewed all information, click the “New Initiative“ button at the bottom of the modal.
Viewing and Managing Initiatives
The Initiatives page includes both card and list views. Select an Initiative card, the Initiative name, or the Details button to open the detail panel.
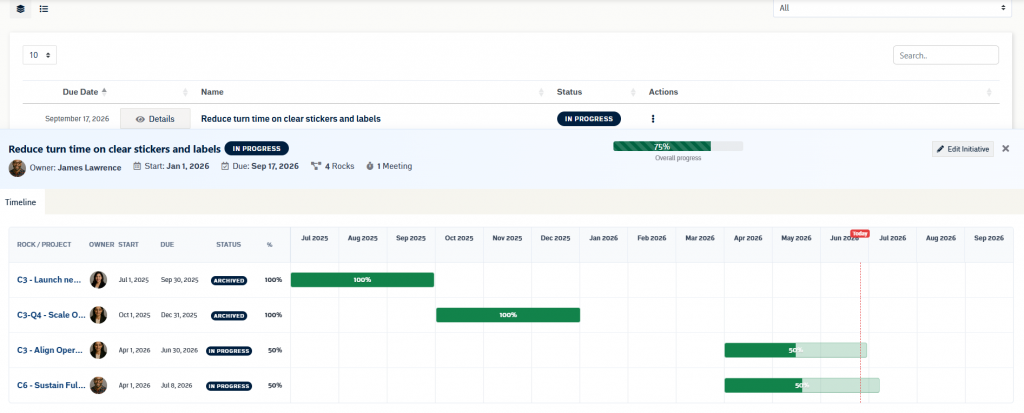
The detail panel shows the Initiative name, owner, start date, due date, status, attached Projects count, meeting count, and overall progress. Overall progress is calculated from the progress of the attached Projects.
The timeline view displays each attached Project with its owner, start date, due date, status, percent complete, and timeline bar. Select a Project row or timeline bar to open that Project in the slide-out detail drawer.
To update an Initiative, use the three-dot actions menu or select Edit Initiative from the detail panel.
If no Projects are attached, the detail panel will show an empty state. Use the edit workflow to attach existing Projects or create a new Project.